Last Updated on 27 January 2025 by Josh Lucas
How to Fit Trickle Vents
Fitting trickle vents involves marking the vent’s position, drilling ventilation holes, and securely attaching both external and internal covers to ensure smooth airflow.
Trickle vents might not be the most glamorous feature of your windows or doors, but they play a vital role in ensuring your home remains well-ventilated, reducing condensation, and improving air quality.
Imagine being able to enjoy fresher indoor air without constantly opening your windows—that’s the power of trickle vents.
They’re small but mighty when it comes to improving the comfort and health of your home.
Poor ventilation can lead to issues like dampness, mould growth, and stale air, which not only affect your comfort but can also pose health risks.
If you’ve decided to take on the task of fitting or installing trickle vents, you’re in the right place. In this guide, we’ll walk you through how to fit trickle vents step-by-step while answering all your key questions.
While it may be tempting or possible to DIY fit trickle vents, in order to keep the manufacturers warranty intact we advise contacting the manufacturer or selecting to add trickle vents at your initial purchase point.
What we’ll cover:
- What Are Trickle Vents, and Why Do You Need Them?
- Trickle-Vents:-Choosing-the-Right-Type
- Step-by-Step Guide: How to Fit Trickle Vents
- FAQs
What Are Trickle Vents, and Why Do You Need Them?
Before diving into the nitty-gritty of how to install trickle vents, let’s briefly cover what they are.
Trickle vents are small openings integrated into the frame of a window or door.
Their purpose? To allow a constant stream of fresh air into your home without the need to open the window or door completely.
This is especially important for combating condensation, maintaining indoor air quality, and meeting modern building ventilation standards.
If you’ve recently upgraded your windows or doors through GFD Homes—whether it’s our sleek aluminium sliding doors or energy-efficient uPVC windows—adding trickle vents could further enhance their performance!

Trickle Vents: Choosing the Right Type
To fit a trickle vent successfully, start by selecting the right model for your window or door.
Trickle vents come in various materials and finishes, so choose one that matches the style and functionality of your frame.
Ensure the size aligns with your ventilation needs.
Measuring Tape: Precision Matters
A measuring tape is essential for marking the exact spot where the vent will be installed. Accurate measurements ensure proper alignment and functionality.
Marking Tools: Pencil or Marker
Use a pencil or marker to clearly outline the area where the vent will sit. This helps maintain precision and prevents errors during installation.
Drilling Equipment: Drill and Bits
Choose a drill and bits suitable for your frame material—whether wood, aluminium, or uPVC. The right tools will make the process smoother and reduce the risk of damage.
Screwdriver: Securing Components
A screwdriver is required to attach the external and internal vent covers securely to the frame. Ensure you use one that matches the screws provided with the vent kit.
Sandpaper: Smoothing Edges
Sandpaper can be used to smooth any rough edges or burrs after drilling. This step ensures a snug fit and prevents air leakage.
Safety Gear: Glasses and Gloves
Always wear safety glasses and gloves to protect yourself from debris and sharp edges during the installation process.
Step-by-Step Guide: How to Fit Trickle Vents
Choose the Right Position
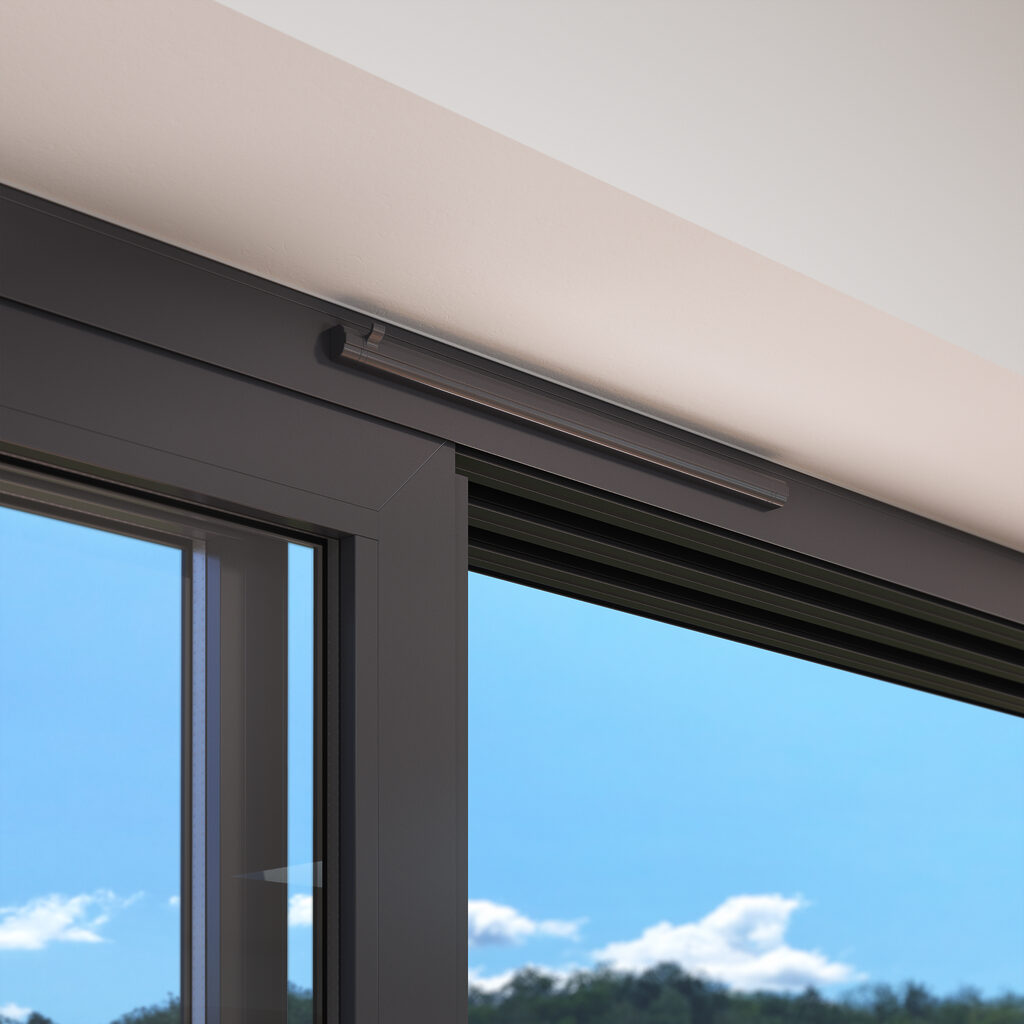
Identify the best spot for your trickle vent. Typically, this is the upper frame of the window or door, as this placement allows warm, moist air to escape naturally, preventing condensation and ensuring even air circulation throughout the space.
Vents are usually integrated into the head frame for optimal airflow for sliding doors or bi-fold doors.
Mark the Vent Area
Use a measuring tape and pencil to mark the exact position where the vent will sit. Ensure it’s centred and aligned to avoid uneven airflow.
Drill Ventilation Holes
Attach a drill bit suitable for the material of your frame (wood, aluminium, or uPVC). When drilling, apply steady pressure to avoid damaging the material. Drill holes evenly spaced within the marked area, ensuring the size corresponds to your vent model for a secure fit.
Smooth the Edges
Sand down any rough edges or burrs left after drilling. This step is crucial for creating a snug fit and avoiding potential air leakage.
Attach the External Vent Cover
Position the outer vent cover over the drilled holes and secure it using screws. Ensure it’s tightly fitted to prevent water ingress.
Install the Internal Vent Cover
Inside the frame, align the internal vent cover with the holes. Screw it into place, ensuring it sits flush for a clean finish.
Test the Vent
Open and close the trickle vent to confirm smooth operation. Check for any drafts or loose fittings.
Congratulations! You’ve successfully installed a trickle vent. Repeat the process for additional windows or doors as needed.
Tips for Specific Window and Door Types
- uPVC Windows: Use a step drill bit for precision. uPVC frames are lightweight, so take care not to crack the material.
- Aluminium Frames: Ensure you’re using metal-compatible drill bits and consider using grommets to protect against thermal bridging.
- Sliding Doors: Position vents at the top rail for maximum efficiency without compromising aesthetics.

Ready to Enhance Your Windows With GFD Homes Today!
By now, you should feel confident about how to fit trickle vents and understand their importance in maintaining a healthy home.
Whether you’re upgrading your windows, installing new sliding doors, or simply looking to improve ventilation, trickle vents are a small yet powerful addition that can make a big difference.
If you’re in the market for replacement windows and want a professional touch, don’t hesitate to call our expert team on 01642 309 576 or get an instant quote online at GFD Homes. We’re here to help bring your home improvement vision to life!
FAQs
How to fit trickle vents?
Fitting trickle vents involves identifying the correct position on your window or door frame, drilling ventilation holes, and securely attaching both the external and internal covers. Follow the step-by-step guide above for a foolproof installation.
How to open trickle vents?
Most trickle vents have a simple sliding mechanism or a flip-down cover.
To keep them functioning smoothly, clean the vents regularly to remove dust or debris that could block airflow. Gently slide or pull the cover to open and adjust airflow. For specific models, consult the manufacturer’s instructions.
What do trickle vents do?
Trickle vents provide continuous ventilation, improving air circulation and reducing moisture build-up. They help prevent issues like condensation and mould while contributing to a healthier indoor environment.
